Creating Fields
This guide walks you through creating a field and exposing it to Consumer and Contributor users in the UI. Ensure you have admin access to Aprimo before starting.
Step 1: Create a Field
-
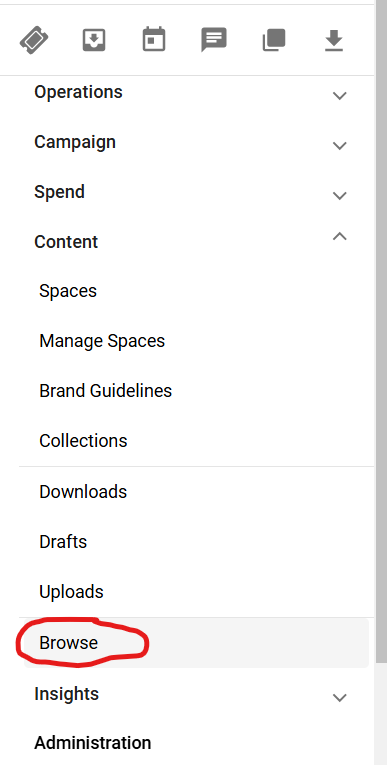
Navigate to Admin UI:
- Open the top-left menu, expand Content, and select Browse.
-
Access Field Management:
- Open the top-left menu, select System, expand Field Management, and choose Create New Field Definition.
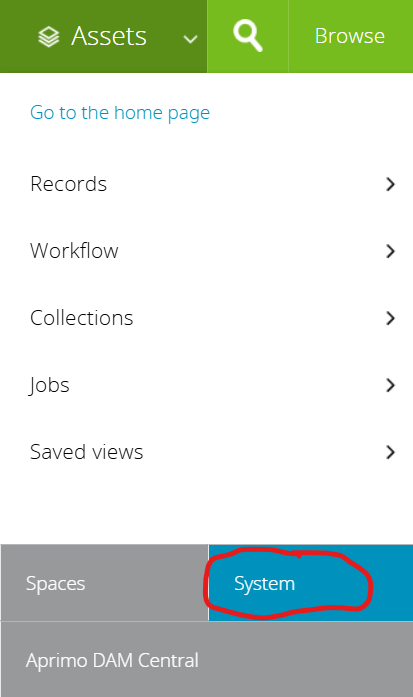
- Open the top-left menu, select System, expand Field Management, and choose Create New Field Definition.
-
Configure the Field:
- Choose Text as the data type and click Next.
- Enter a System Name (e.g.,
tutorialField) following your organization’s naming conventions. - Set the Scope to Record Content Class Dependent.
- Provide a Label (display name in the UI).
- Click Create.
Step 2: Associate the Field with a Classification
-
Navigate to Classifications:
- Open the top-left menu, expand Asset Related, and select View All Classifications.
- Select a
classificationto link thefieldto.
-
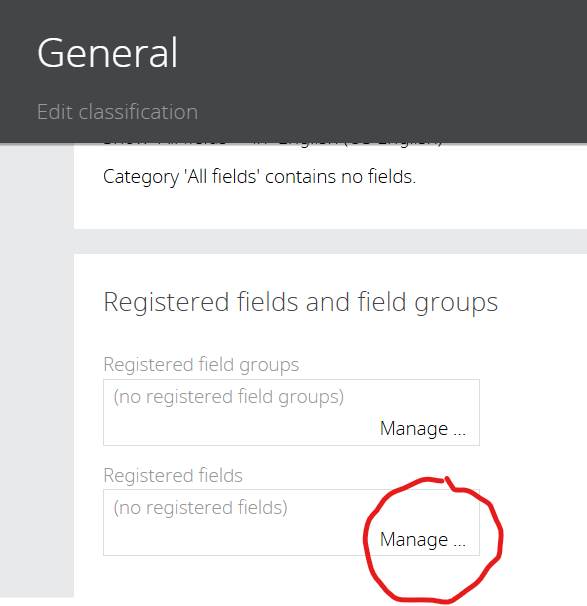
Edit Classification:
- Click the Edit (pencil) button.
- Under Registered Fields, click Manage.
- Add your field to the Registered Fields section.
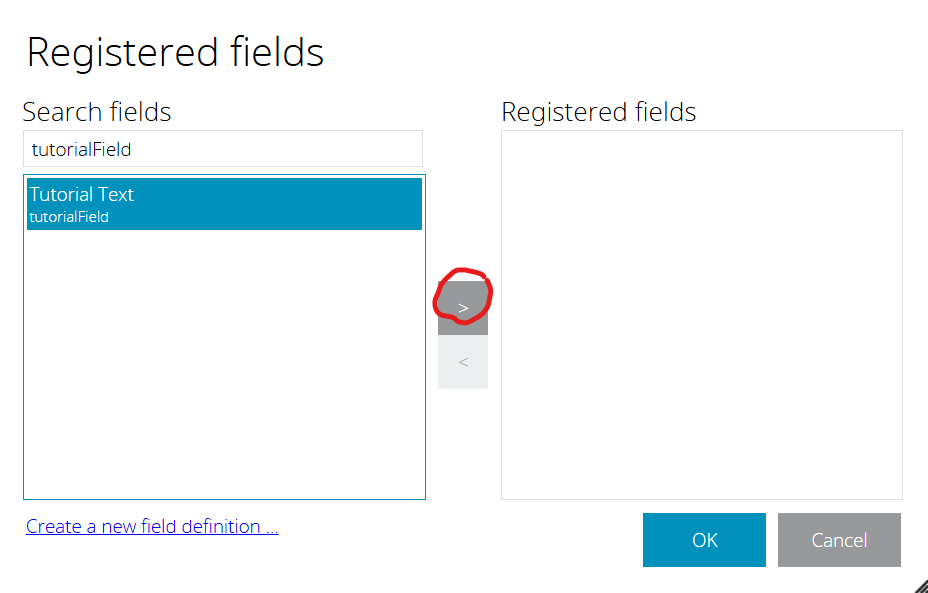
fields can also be added to a field group, and then the entire field group can be associated to a classification.
At this point the field will be visible within Admin UI, but not within DAM UI. Lets configure the field to be used in DAM UI.
Step 3: Add the Field to a Content Type
-
Go to Fields Setup:
- Open the top-left menu in System, select Quick-start Guides, select Content Modeling, and choose Content Types Configuration.
-
Select a Content Type:
- On the left, pick a Content Type (e.g., Asset).
- On the right, locate Fields.
-
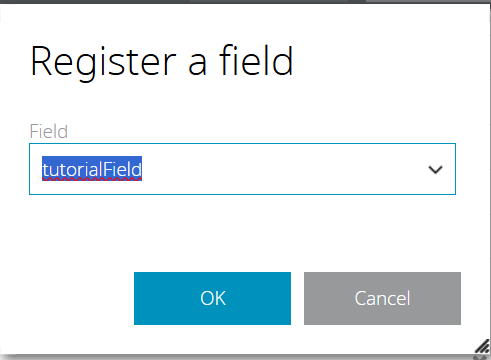
Add Field To Content Type
- Select Register a Field.
- Choose your new field and select OK.
Step 4: Add the Field to DAM UI
-
Go To Fields Setup
- Open the top-left menu in System, select Quick-start Guides, select New User Interface, and choose Fields Setup.
-
Select Content Type
- On the left, pick the Content Type you added your field to.
- On the right, find the Details View Configuration
Details View Configuration defines the UI layout for an asset's page. Similarly, Card View Configuration controls the data displayed in Card View, such as on a Search results page.
- Update JSON Configuration:
- Find the Asset Details container in the JSON.
- Add the following object to include your new field:
{
  "type": "field",
  "size": "md",
  "name": "tutorialField"
} - Save your changes.
Step 4: Verify Your Field
-
Test the Field in DAM UI:
- Navigate to an asset, classify it under the appropriate classification, and select Edit.
warningEmpty fields won’t appear in the DAM UI until a value is entered.
Congratulations! Your new field is now visible and functional in the DAM UI.